April 21, 2009

Build a Dinghy: Part 10

This picture shows the scarf joint after sanding it out. I used a Fein Multimaster http://www.feinus.com/ to bring the glue line close to flat. Since cured epoxy is very hard, and I wanted to get the glue line flat without sanding through the plywood veneers, I used the Multimaster to sand just the glue-line. This tool has a variety of attachments perfect for finish work in tough situations, and where precision is required. I highly reccomend this tool for boatbuilders.
Once the glue line was nearly flat, I finished sanding the old fashioned way: with sanding block and long board.
No that I've pre-fabricated all the major parts, the next post will show initial assembly. She's gonna look like a boat soon!

April 15, 2009

New Reality: Boats Built to Order?

The changing economic scene may drastically alter the way we buy new boats in the future. Many senior executives at boat manufactures I've spoken with recently have hinted that the days of dealers having boats in stock ready for delivery, may be coming to an end. Instead, we'll go to a boat show, see a model, and then place an order. If you want a 23 and all they have built is a 25, then you'll be told " its the same as the 25 except a little smaller." Waiting 2-3 months for a boat will become the norm. Its not just that consumers arent spending, but commercial banks are changing the way they loan money to boat dealers ( and RV, lawn equipment, piano, and other high end products). In the past, a dealer would get financing from a company likey GE Capital http://gecommercialfinance.gecapsol.com/cms/servlet/cmsview/ComFin_Corp/prod/en/main/index.htmlthat would allow them to purchase boats interest free for about 6 months. After that, they would have to start paying nominal interest, say 1-percent a month. After a year, the boat would have to be paid off in full. This worked for dealers because it enabled them to stock boats with little cash outlay. Once they sold a boat, they would pay it off. Remember that it can take 4 months or longer to sell a boat. So with the free interest, the dealers ability to discount the boat to the consumer looking to haggle was possible. But now, the floor planning banks require 5-percent of the loan after 6-months, followed by another 2 percent every month til the end of the term. At todays boat prices, a 20-footer costs $30K, its not hard for even a small dealer with light inventory to still have millions of dollars in inventory . With just a mil in inventory, a small amount, that guy has to come up with $50, ooo after 6-months and $20K every month following. Its crushing, it takes the ability to discount the boat away as profit is eaten by interest. So what are dealers doing? They arent ordering boats from the factories for stock. Now the model of ordering a boat and waiting months for it is already established, in the high end boats and in larger boats targeted at wealthier customers. Knowing they have a sale, an ordered boat can be discounted somewhat and the dealer is happy to make and service the sale becuase he's making profit. But for "Joe Sixpack" this means buying something sight-unseen, and probably at a higher cost, because the boat will no longer be produced in high volume. For the dealers who service and sell smaller boats, the diminished profit potential, and the loss of "impulse" sales, means its not worth being in business--they will do something else ( I would). Many who choose to stay may die trying. The landscape is going to change dramatically.

April 14, 2009

Build a Dinghy: Part 9

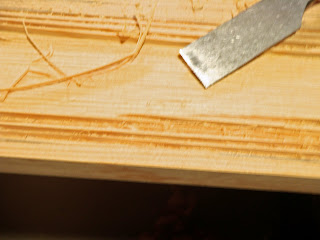
OK, I told you all about the sweet piece of VG fir I got to machine into various structural members for the Summerbreeze I'm currently building. Here's how I got out the rub rails from that board. The plans call for a 1/2" to 5/8" thick by 1.5" wide strip to be utilized for the gunwale, or rubrail, or guard,if you prefer. This is the batten that's installed on the outside of the planking at the sheer. I was fine with that, but concerned about the exposed end grain at the top of the plank. I could just install this rail, then install a similiar rail inside as an inwale and then cap the top with a covering board. BUT....I want open gunwales, with spacers, both for the aesthetics, and for the functionality of being able to turn the boat over after a sail and having all the water run out. So here's what I came up with.
I measured and marked the width of both rubrails on the edge of my board, adding, and marking for, 3/8" wide rabbet( short L-shape) to be cut out. When installed, the rabbet will cover the exposed grain of the ply at the top of the sheer. I tacked my trusty aluminum channel as a fence, set my saws depth of cut to 6mm (1/4"), the planking thickness. I then made two very accuarate cuts with the aluminum guide, each side of my marked width. I then used the saw free-hand to make about 20-kerfs(cuts) between the accurate cuts. I then chiseled out the waste. Voila! Rabbbeted rubrails! All I have to do now is remove the rest of the waste, then mark an cut down the center and I'll have two rails with protective sheer rabbets. ( Hey, did I just invent a new term?)
This technique is very easy when you're chisleling across the grain. Here, I had to do it along the grain, which is very splintery work. You go easy, pushing the chisel slow and steady. I also wore leather gloves which saved my from getting porcupined about a hundred times.

April 13, 2009

Build a Dinghy: Part 8

Whether its a go-fast, a sportfisherman or a little plywood boat like this Summerbreeze I'm building, when you build light, you have to build stiff. Stiffness is what maintains the hull's shape. Here, stiffness is acheived largely by the use of rails cut from dimensional lumber. I'll need to cut Gunwales, inwales, a keel ( shoe) and chine stringers.
I selected a 1" x 12" x 12-foot long piece of vertical grain Doug Fir for these parts. Douglas fir is strong for its weight and glues better than oak. The vertical grain insures better bendability and increased reliability. It has less chance of cracking or splitting in service because with such straight grain I can cut it so that the load paths all run along the grain. If the grain were wavy, the forces exerted on the parts in service would find a "way out" following the grain to the edge of the board and cracking it. Hey, buying a board like this is no guarantee, it just ups the odds. Nor is it cheap. I paid 60 bucks for it.
Of course I'll get my two chines, two rubrails, and my keel shoe from this one board. I'm going to use pine for the inwales, as I have a nice length of it. Plus, the contrast with the fir, which is a tad darker than pine, will look good when all is varnished.
Notice how I'm using one piece of plywood set up on horses as the bench for this boat. In the background is my bottom, glued up and waiting to be trimmed to shape. In the foreground is the board I'm cutting my rails from. I use a circular saw set to the design bevels and run it along a piece of aluminum channel as a fence to keep me cutting straight. The board is clamped, the channel is tacked to the work station and my cutting lines are heavily marked.

Build a Dinghy: Part 7

The Summerbreeze design has a number of goals. Its to be a lightweight boat, under 70-lbs or so. It's a rowboat that can sail reasonably well. Its interior is kept wide open for sprawling space by using a leeboard instead of a centerboard or daggerboard to get upwind.
Its also designed to be easy and inexpensive to build. One way of keeping costs down is to use materials to the fullest, and designer David Beede accomplished that goal with Summerbreeze: it requires just two sheets of plywood.
How we made the 11'6" hull sides (planks) out of two 8-foot sheets--by using the scarf joint-- was detailed in the last post.Here we use the other common method of lengthening sheets of plywood in small boat construction: the butt block.
To make the bow of this boat, I cut two 32" long trinagles off the corners of a sheet of ply. These are flipped and attached to the front of edge of the sheet using butt blocks. The blocks are 3-inch wide strips of 1/4" (6MM) ply. Thats a 12:1 width to thickness ratio, the same as the scarf bevels, interestingly.
After cutting the triangles, I do a dry fit, and mark everything : centerlines, outlines, etc as shown in the photo. Next, I wet out the joints with straight epoxy and let it soak into the veneer for about ten minutes. This prevents the dry wood from sucking all the glue out of the joint. After the wet out has soaked in, I apply another coat of epoxy, this time with a thickening agent, to all the mating surfaces. This coat is the thickness of stiff batter. Then all the parts are laid in place and pressed in gently.
I used paint cans for clamping weights, using packing tape or other plastic on their bottoms to prevent them from sticking to the glue. Also note how I used the squeeze-out to form a filet (bead) along the butt blocks. Filets make the joint even stronger. You want squeeze-out becuae it shows you that you have complete glue coverage. But cleaning up the hardened epoxy is tough....

April 7, 2009

Build a Dinghy: Part 6

Here's the results of the scarf joints detailed in Part 5: 11'5" planks from 8-foot plywood. Once bent around the frame, flare and curves will be induced, transforming these straight cuts into sweet lines. ( I will probably have to round the angle aft, where the stern rocker forms, just a little more.)
The other photo shows a closeup of the joint itself. You can see I'm about 1/64 high on one side, a result of my temporary table ( 3/8 plywood) deflecting under clamp pressure. No biggie, just means a little more sanding and filling than anticipated.

April 3, 2009

Build a Dinghy: Part 5

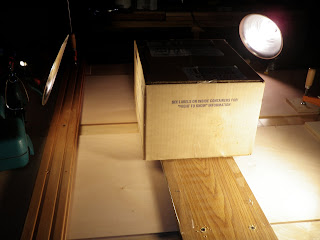
Last time, we saw how mating bevels were cut prepatory to joining two pieces of plywood to achieve a length longer than the standard 8-feet. Here we see the glue-up. I use epoxy, as it is tough and strong. Others have had success with weldwood, resorcinol, and even contruction adhesive out of a tube. I'm comfortable with epoxy, having used it for decades. Comfortability with an adhesive's properties and working times is almost as important as what glue to use, as you can "blow" a glue up if the unexpected happens--like the glue setting up before you've aligned your pieces.
Here we see the mating bevels first slathered with straight epoxy, which is allowed to soak into the grain. This prevents a "glue-starved" joint. After a few minutes, I apply a thickened mixture, adding colloidal silica to the glue mix, and paint that on. The planks are flipped, the bevels mated and all is clamped, weighted and screwed to the work table. I applied lights for heat, to help the cure. Note that the clamping bar (the shelving) and the work table are covered with polyethylene film to prevent sticking to the work.
I'll leave this clamped up for at least a day, then stow the planks in a safe place while I glue up the bottom. This design uses a cool technique for getting an 11-foot boat bottom out of a single 8' sheet of ply.....

Build a Dinghy: Part 4

This boat, a Summerbreeze, designed by David Beede (http://www.simplicityboats.com/) uses plywood, 11'6" long for the sides. To get the length, I used a scarf joint and glued two sheets of ply together. This involves cutting mating bevels on the pieces to be joined. Here we see the begginning of the bevels; and then the nearly complete bevel. I did the cutting with a low-angle block plane and then finished with a sanding block. You could also use a power plane, a belt sander or a grinder. I like the zen aspect of hand-planing: here I put on some Pink Floyd, a pot of coffee, and just zoned-out for an hour.
A scarf joint is as strong as the original plywood and, when bent, wont show a hard spot like a butt block does. In Part 5, I'll detail the glue-up.

Build a Dinghy: Part 3

Here's a closeup of the limber hole in the frame. This allows any spray to flow aft where its easier to sponge out. I cut the limbers by butting another piece of one-by wood to the frame, then used a plug cutter in a drill motor to make the a circle. When I removed the sacrificial piece, I had a perfect half-circle. To protect the exposed grain inside the limber from water intrusion, I glued in PVC tube the OD of which matched the ID of the cutout. When the glue cures, I'll plane or sand flush with the bottom of the frame.

Build a Dinghy: Part 2

To get started building your small boat, select a plan and then collect materials. I chose to use Marine Plywood, made from Okuome, a tropical hardwood. I ripped the panels into planks using a piece of aluminum extrusion as a straight-edge set 3-3/4 from the cutting line (the distance between my saw's shoe and blade.
Interestingly, the "marine" designation doesnt mean rot-resistant. It means that it has more veneers for a given thickness, in this case, 5-veneer 1/4" (or 6mm). It also means there are no voids. I can attest to this, as when I cut the sheets into planks, there were no voids to be seen. Voidless means stronger--important in a lightweight structure. It also means it will bend "fairly" producing sweet curves.
You'll also need some dimensional lumber to make the frame and transom. Here's picture of the frame for the boat I am currently building. I used Douglas fir 1" x 2" and plywood gussets , cutting the angles and bevels per the plan using a handsaw. The frame is glued with epoxy and fastened with silicon bronze screws through the gusset. Note the "hole" I filled with thickened epoxy at the intersection of side, bottom and gusset pieces.