Inwale Glue-Up
I prepped by masking the boat, as I've learned that blobs of cured epoxy take more time to clean than to prevent. In this shot you can see the blocks, quarterknees, breasthook are ready to accept the rails. I dry fit them to be sure.

During the dry-fit, I marked the rails so I would know where to apply a glue. I then slathered on thinned epoxy, to both the boat, and the rails, then buttered each with epoxy mixed with cabosil (colloidal silica),

and snapped the rails in place. They stayed more or less put without any clamps, but I applied light clamping pressure to ensure good "squeeze-out."
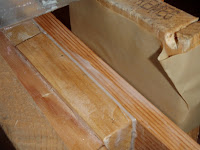
I let them cure for two days, then used block plane to tune everything together. Note that per the teachings of Greg Rossel, my rails display "virtual camber." That is, they are sloped outboard, giving a jaunty look. Much saltier than had I installed them horizontally.


In this last shot, we see that I have planed the portside rail, but have not yet "tuned-up" the starboard rail, bringing the inwale, outwale, and spacer blocks into the same plane. Click the pic for a larger view.
 Fixed the bike, picked-up the kids and it rained...so I got out of yardwork. Hence, I rushed to my bench, to start building the oarlock pads for my Summerbreeze Skiff. First, I cut some leftover chine stock into 10-inch long pieces and dry fit them together.
 Next, I coated the faying surfaces with straight epoxy; then buttered them with epoxy thickened with colloidal silica. I used wire ties to clamp the bundles together and a spring clamp to induce a little extra squeeze-out. Longitudinal alignment was achieved by eye, basically, as these 10-inch long blocks form rough stock for oarlock pads that will be 8-inches finished length.
Hitting the road, so wont be back to this til next weekend, when, hopefully, I'll shape and install the pads and locks. Then all I need do is flip the boat and give the topsides two more coats of Kirby's. At that point it will be a completed rowboat. Of course, I'm building the sailing version.....but it will be nice to splash the boat while I work on the spars, rudder, tiller, and board.
Next, I coated the faying surfaces with straight epoxy; then buttered them with epoxy thickened with colloidal silica. I used wire ties to clamp the bundles together and a spring clamp to induce a little extra squeeze-out. Longitudinal alignment was achieved by eye, basically, as these 10-inch long blocks form rough stock for oarlock pads that will be 8-inches finished length.
Hitting the road, so wont be back to this til next weekend, when, hopefully, I'll shape and install the pads and locks. Then all I need do is flip the boat and give the topsides two more coats of Kirby's. At that point it will be a completed rowboat. Of course, I'm building the sailing version.....but it will be nice to splash the boat while I work on the spars, rudder, tiller, and board.


